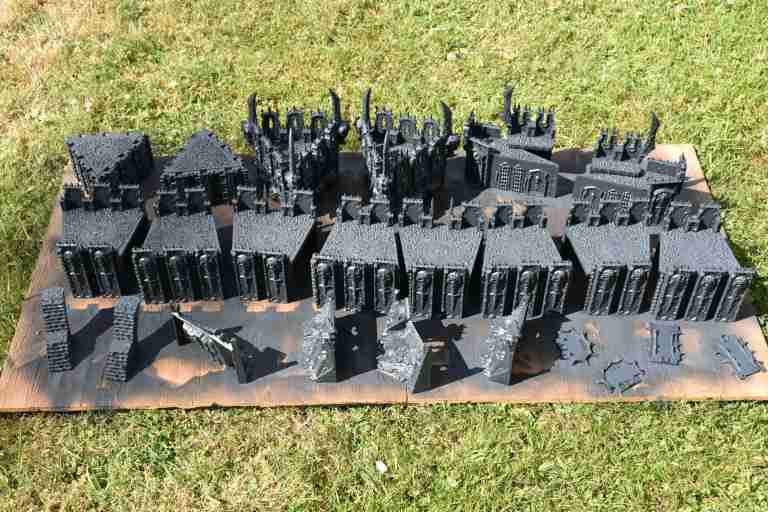
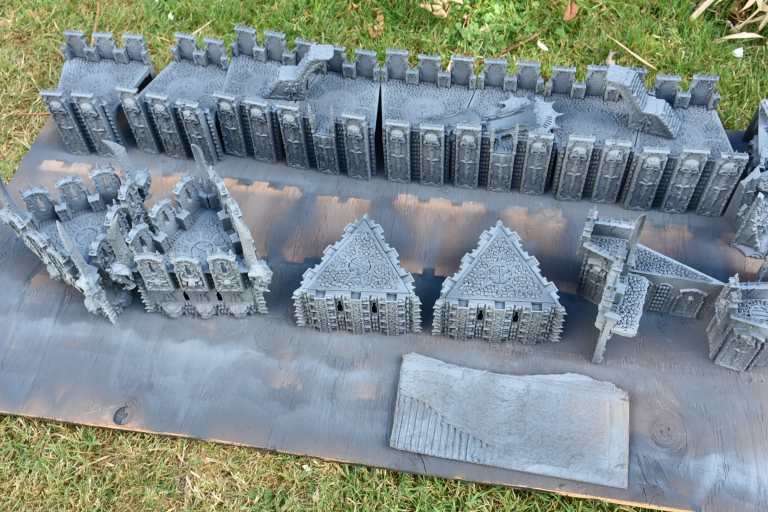
Today I embarked upon my quest to finish painting my Chaos Helfort! I bought this back in May with two additional wall pieces and end caps, and have been slowly building away. When I finished building last night I stood back and looked at it, and I knew that there was no way I was going to use a regular paint brush. As I don’t have an airbrush either, I knew I’d have to resort to some regular cans of spray paint. Now, this method lacks finesse, but it gets the job done, and I can always add small details later, or paint specific items after the bulk of the work is done.
Scenery is an important part of our hobby, and it can be easy to go overboard on it. The focus of the games is on the miniatures, and scenery should help those miniatures to stand out. Too much detail on scenery just helps your models become lost, and can make it very hard to get decent photos. For the Helfort I knew I didn’t want to paint it in the traditional way with all the metalwork. Instead, I wanted it to look as though it was made of stone, capped with copper cladding, so that it works in a multitude of settings. This also helps keep it rather neutral, and act as a suitable backdrop for photography, yet provide enough visual interest for games.
Here below you will find the steps I took with some pictures and general tips. I quite like this kit, but it has its problems which I will talk about in a later post where I give my full review of the Chaos Helfort.
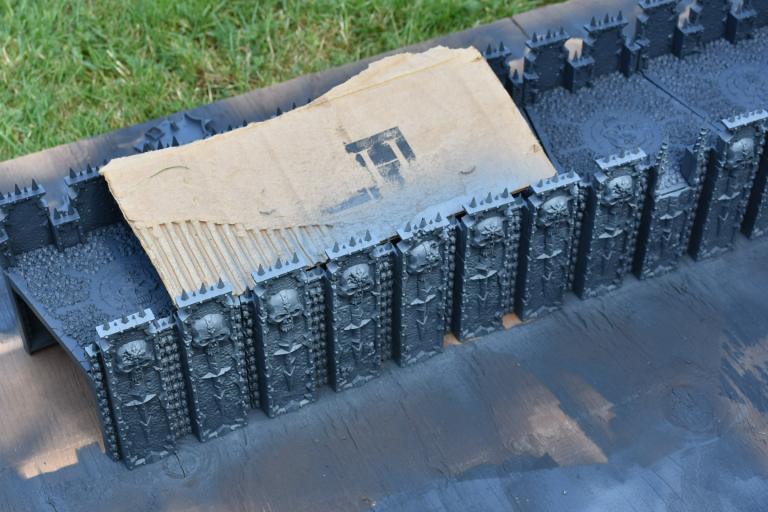
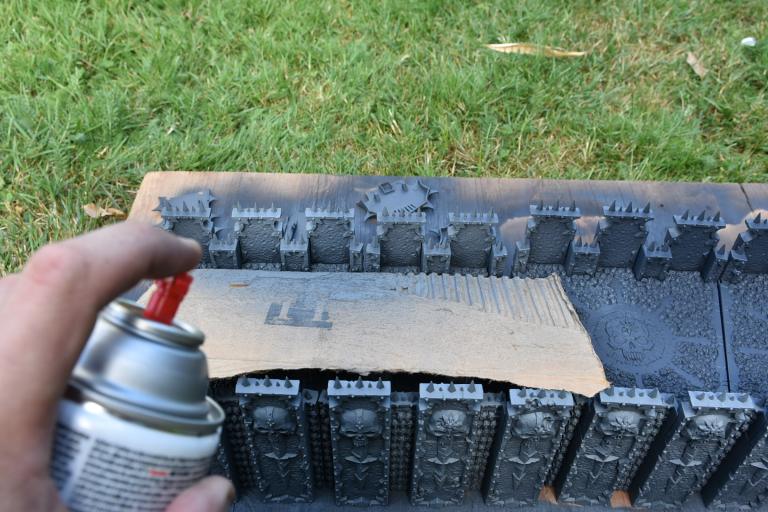
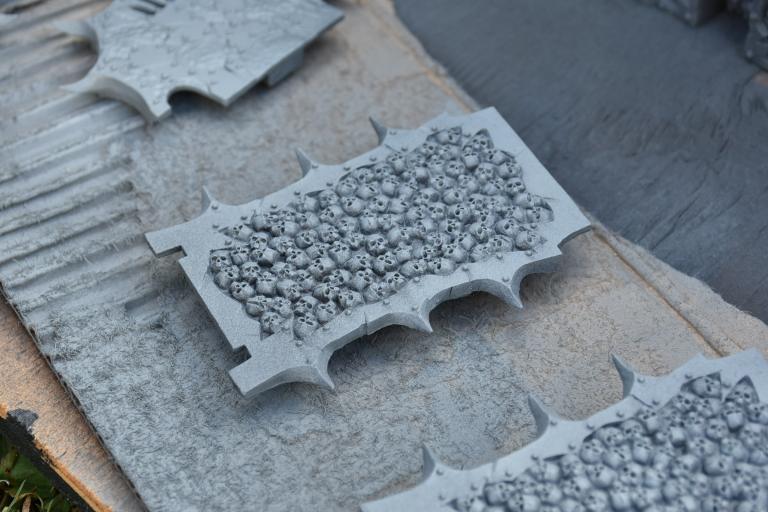
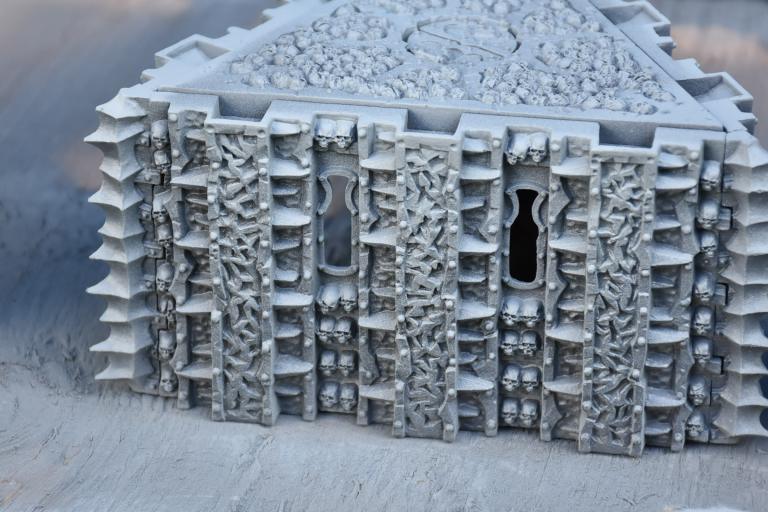
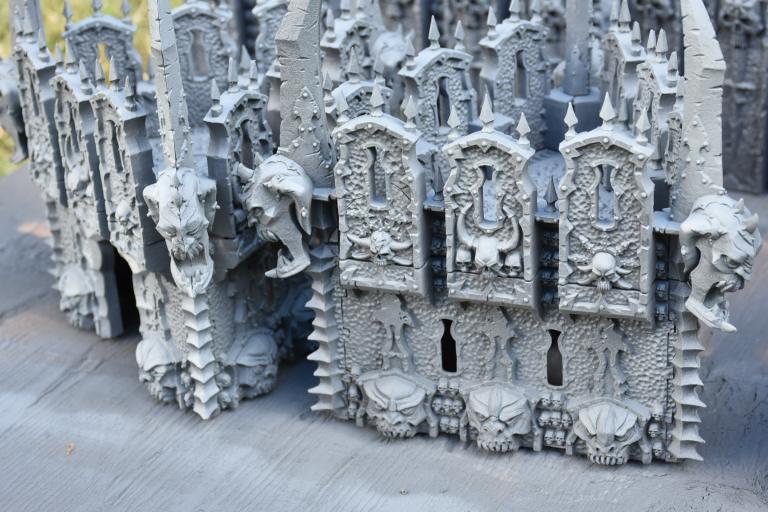
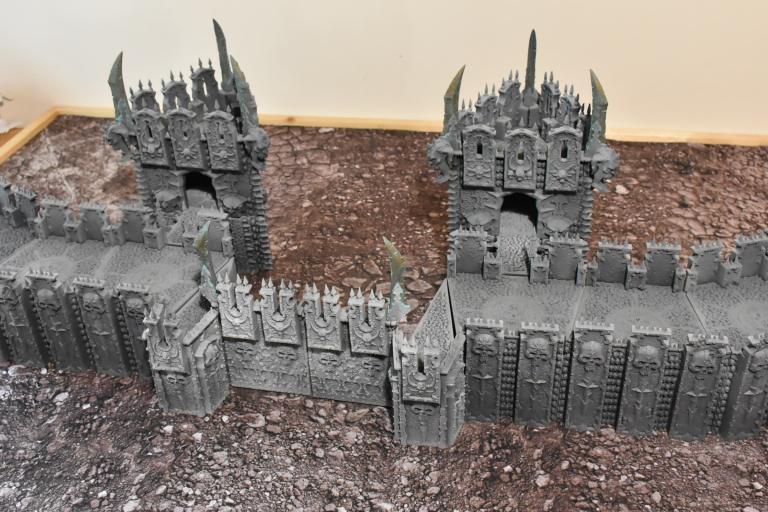
The assembled materials. I used the Krylon chalky finish paint, as it was the only line that had the colours I wanted, and was flat instead of a satin or gloss finish. I tested the texture of the paint on a wall section to see if I liked it and how good the coverage was.Everything primed black. I used about two thirds of the can to make sure everything was covered.Next everything was painted using the darkest grey paint. I made sure I pointed the can down at an angle to get more paint on the upper surfaces, leaving the recesses in shadows.For the next shade of grey, I held the can almost perpendicular to the wall section, and masked off the top part with the piece of cardboard. This caused just the top parts to get a nice dusting of lighter grey.I repeated this for the inner section of the crenelations, again masking off the top area. To paint that part I used the can facing along the edge of the walkway, just to catch the top parts.The different layers of paint are starting to have an effect. I sometimes sprayed from three feet away to give an area a light dusting, even without using a high angle.The last shade of grey. This was applied to just the very tops of the walls and towers. I also sprayed the gate face on from three to four feet away to give it a dusting. I wanted it to stand out just a little, to show its importance, and the fact that it was probably used lots.Here’s what it all looks like by this stage. The highlighting has worked really well.Shadows are really starting to come out now.To make the towers and gate stand out even more from the walls I decided to paint the large spikes with an oxidized copper appearance. First I used Blighted Gold from P3 on the spikes, and then washed the entire spike with Nihilakh Oxide from Games Workshop. It blends nicely with the stone, but adds some additional detailing.And here’s a portion of it assembled! The gate immediately jumps out due to it having a little bit more of the light grey.A closer view of the gate with models. Chaos Helfort? More like Death Helfort!
Thanks for sticking it out to the end! I’m really pleased with how this turned out. The kit itself is fantastic, if a little painful to assemble, and I do hope this helps break some of your dread from starting big scenery projects like this one.


Looks great!
LikeLike