Here’s how I managed to create a cheap, reliable, and good looking army transport case for under $30 that also keeps my models from taking over the living room at home. All I used was an $18 case, $5 worth of foamcore, $6 worth of magnets, superglue that I had already, and a ton of patience. The beauty of this project is that the materials are cheap once you have the case, so making trays for different layouts only costs some foamcore and magnets.
First I needed to find a case that was size. What are the right dimensions? This is entirely up to you. If you’re transporting a horde army like Tyranids or Orks, you’ll probably want a fairly large case, or a garbage can. If your army consists of only 6 Tau Riptide suits, a small case will do, perhaps a covered cheese container. It’s better to get a case that’s slightly too large, as you can always fill the extra space with more trays to take up the room, or buy more models. A good idea would be to line all your models up on the table base to base and see how much area it covers. Divide that roughly in half, and use that to determine the length and width of your case. As for depth, I wouldn’t go shallower than 6 inches. This allows you to stack rhinos in trays and fit other taller models in their own tray. The case I chose was from Princess Auto, and cost me $18. It came with some dividers and a strap, and is 18″ x 13″ x 6″.

Having obtained the case I began creating trays for the miniatures out of foamcore. Foamcore is a fantastic thing; it’s light and strong, and incredibly cheap. I bought it from the dollar store for $1.25 a sheet, 30″ x 24″. I bought 4 sheets for $5, and only ended up using 3. There was a lot of trial and error here, experimenting with different sizes and depths, but in the end I settled for a design that has two trays that sit side by side and cover the entire bottom of the case. It may be tempting to go super modular, having specific trays for certain vehicles, but each time you add a separate tray you lose about a quarter inch due to the thickness of the foamcore walls.
Determining the depth of each of the trays requires a little forethought. I first picked out all my models that were the shortest, in this case my tactical marines. I measured the height of the tallest one and added an extra 1/8″, using that to determine the first tray depth. It’s important to keep similar height models to a tray so that you don’t waste precious vertical space. Another very important thing to keep in mind is that the bottom of the tray takes up space too, so each tray you add eats up another 3/16″.
Before you fully assemble these trays, draw a grid for your magnets on the base. You already know what models are going in the tray, and if you’re lucky most of your models should have similar base sizes. Remember to factor in your wall width too when measuring out your grid.
Now you need to glue the magnets down. This part is a bit of a pain, but once you get a method going it goes fairly quickly. I held the stack of magnets in one hand and kept them always facing the same direction so I knew that every magnet I glued down would have the same polarity. Using superglue, I put a dot of glue on the intersection of the grid, and placed the magnet down on the foamcore, near the glue. Then slide the magnet to the right spot and hold it for a couple of seconds. Repeat this a couple hundred times.
To magnetize the models you want to glue the magnets facing the other way, meaning that you’ll have magnets that want to stick to each other rather than repel each other. I found it a little challenging to get the magnet into the base of the model, so I put the magnet down on my work surface, licked my finger and used that to grab the magnet and put it into place. After a couple of seconds I could remove my finger and the magnet stayed put. If the magnet were any heavier this wouldn’t work. If the magnet slides a little on the base, use something non magnetic to push it into the right position.
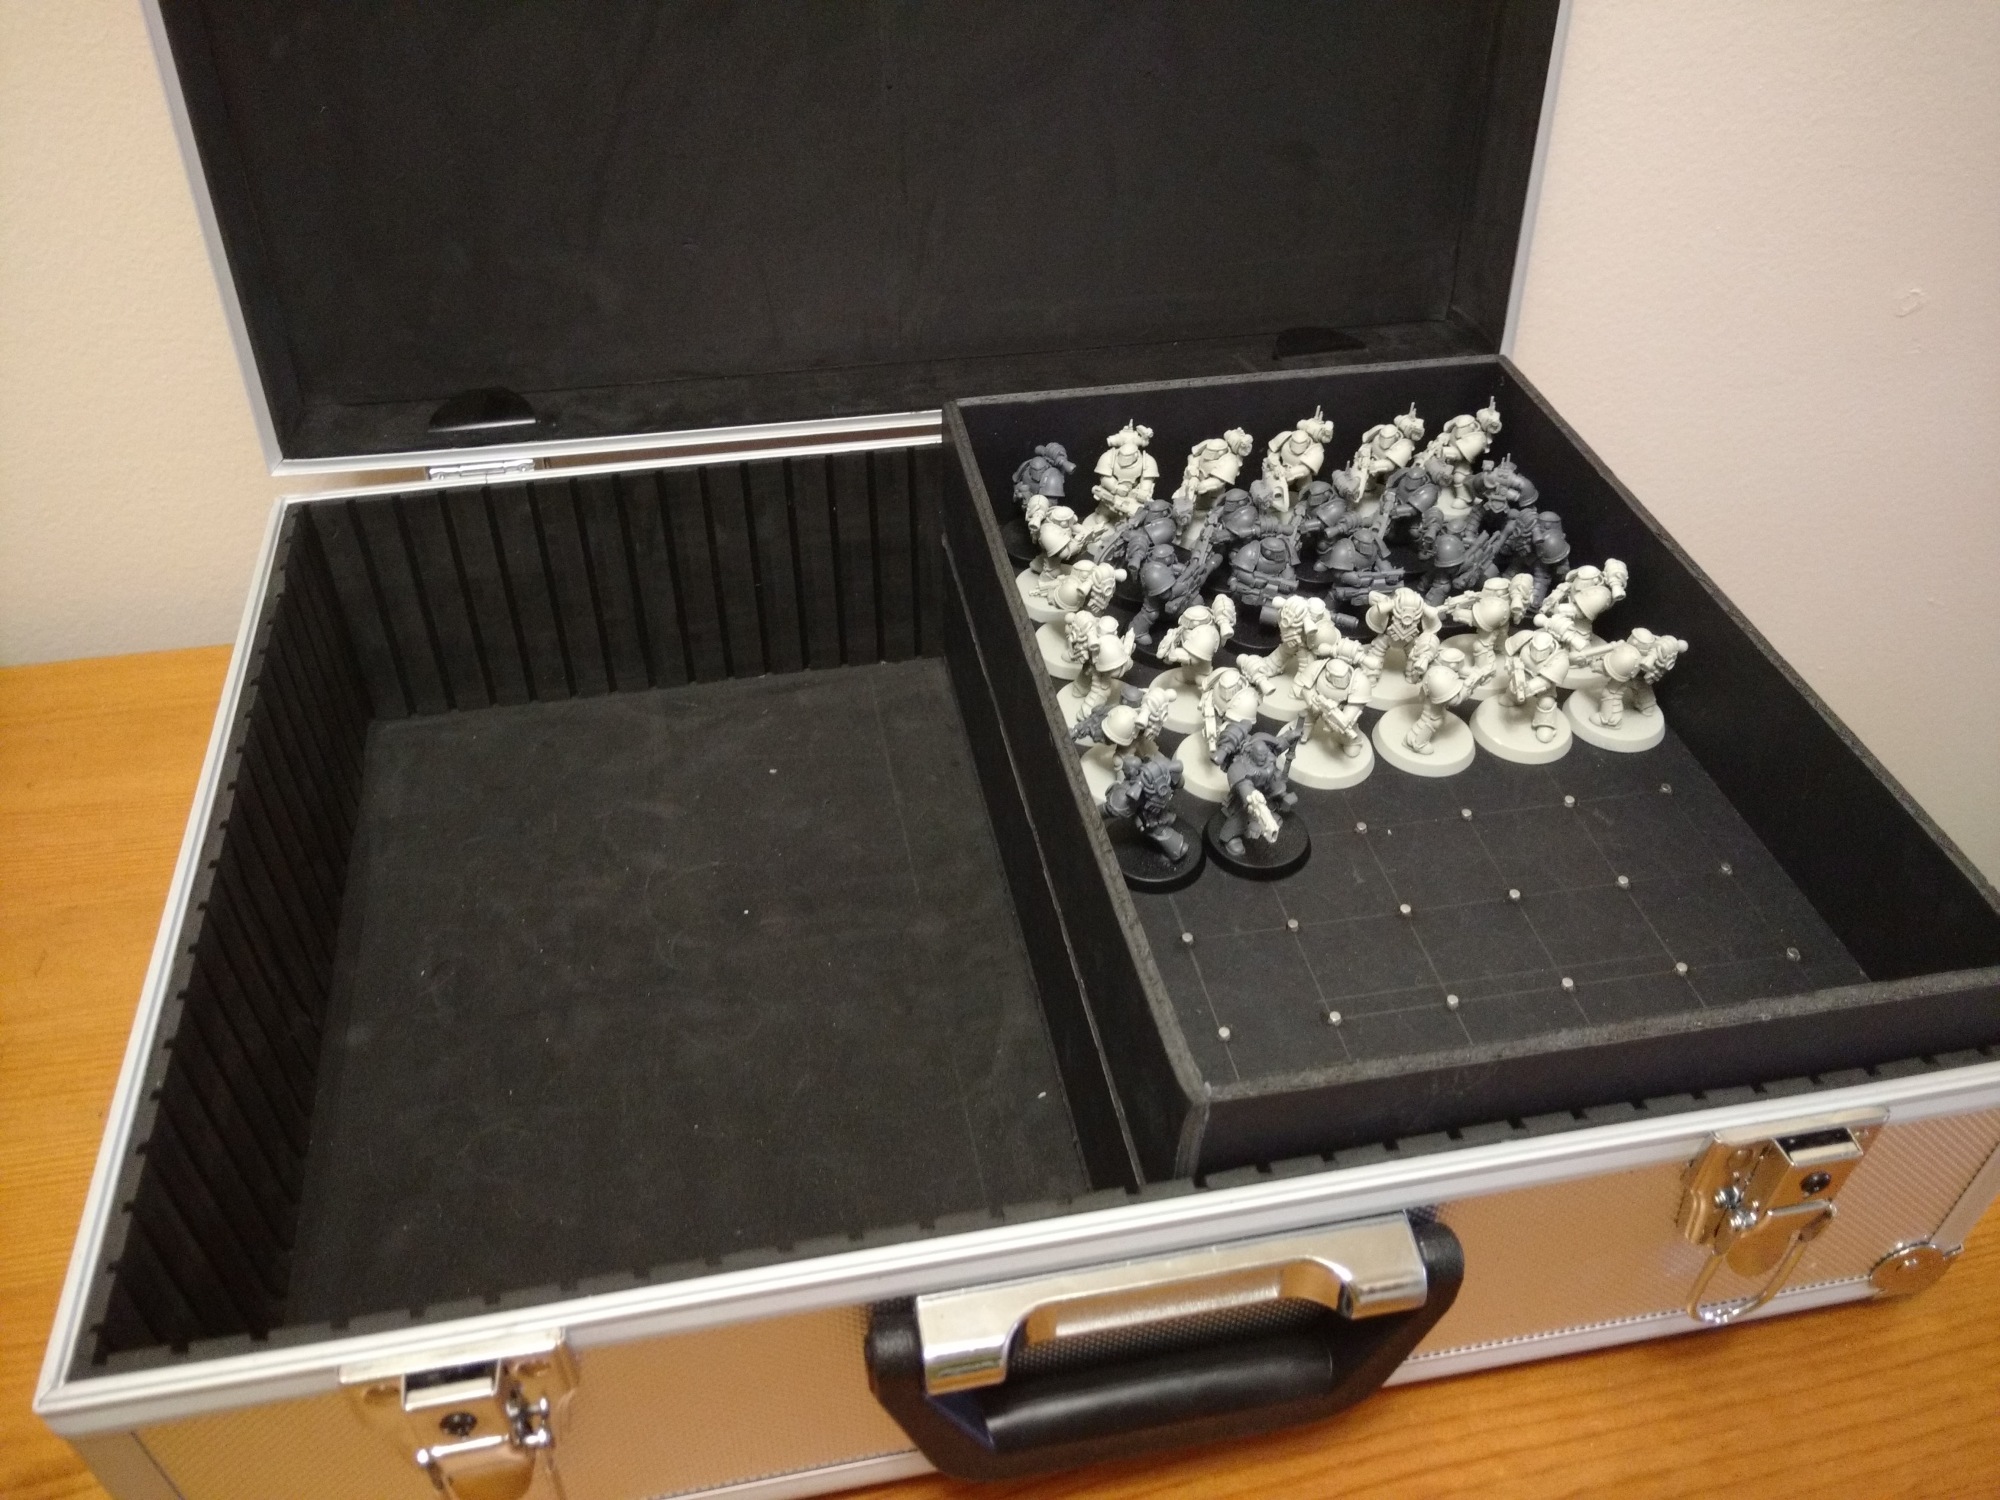
And here we have the end result. There’s still room on the right to sit a codex under the trays. The tactical marine tray holds 72 marines on 32mm bases, and it holds them well. You can turn these trays upside down and give them a shake, and nothing moves. All I need to do is write on the side what the contents are for storage on my shelf.


The tactical marine tray came to 2 1/4″ with the 1/8″ tolerance and 3/16″ base, meaning that I couldn’t fit 3 of them on top of each other. However, I know that I’ll have some plague cultists eventually in this army, using Age of Sigmar Crypt Ghouls models, which are a fair bit shorter than tactical marines. That means that I could have 2 tactical marine trays, and the shallower plague zombie tray on top. On the left side I plan to make some trays so that I can fit 2 Vindicators, a Land Raider, and 4 Rhinos.

Having seen this in person, I can attest this is a great idea. And one I probably should have done rather than the piles of battlefoam I have at home!!!
LikeLike